LGTM gifアニメーションを作ろう

12/10のアドベントカレンダーは、
HTMLファイ部で雰囲気フロントエンジニアのマチダがお送りします。
去る11月25日に行われたHTML5 Conference 2018
(https://events.html5j.org/conference/2018/11/)
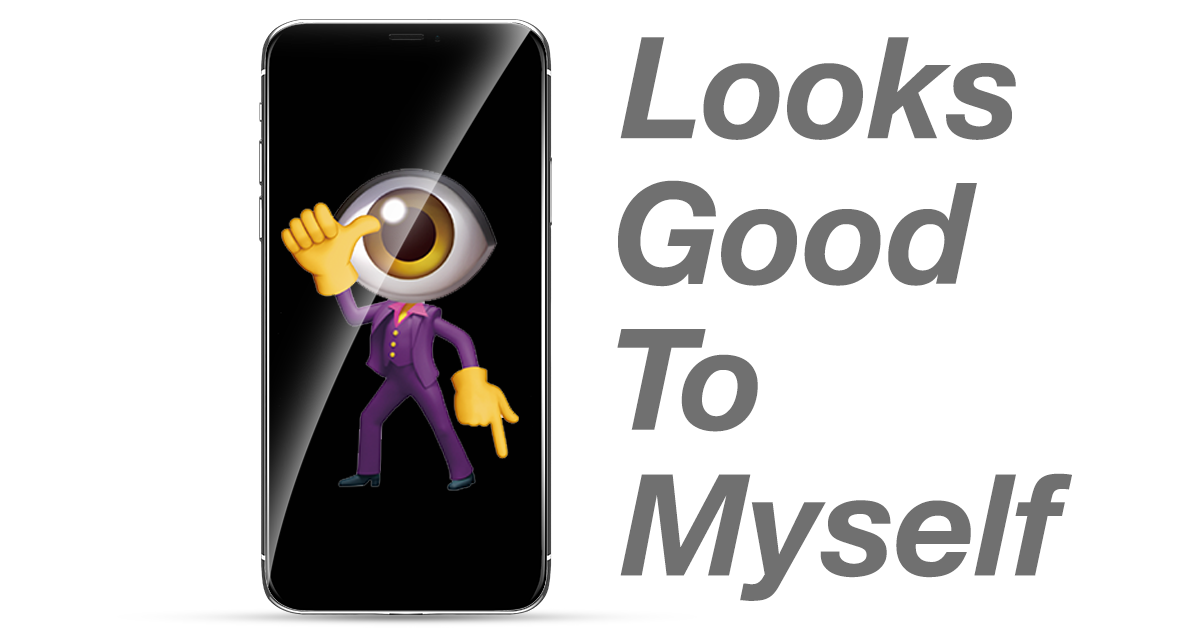
において、弊社オリジナルコンテンツ
Looks Good To Myself
を展示しました。
https://cl-fibe-conf-lgtm-1302249.firebaseapp.com/#/
iOSの人はSafari、Androidの人はChromeでみてね!!
(もしかしたら閉じてるかも)
あなただけのオリジナルLGTM(Looks Good To Me) GIF動画を作ろう!
専用のWebアプリからカメラで撮影するとGIF動画が生成され、
デジタルサイネージにそのまま反映されます!
用意されたカメラフィルターを使えば、
よりクリエイティブなLGTM GIF動画が作れるかも?
ちなみに去年は
Final Flash 2020
という寄せ書きコンテンツを
Flash
で作成しました。
http://create.kayac.com/frontend/final-flash-2020/

LGTMとは
"Looks Good To Me”
つまり「自分的にはOK」ということです。
PullRequestなどのコードレビューで、レビュアーがOKを出すときにLGTMとコメントする習慣があります。
「とりあえず動いてるからおk!」みたいなときでもLGTMです。

単に文字列としてLGTMとコメントするより、画像を貼り付けてほっこりしようぜ、という文化です。
animation gifとは
GIFの読み方は「ぎふ」「じふ」。公式は「じふ」
無限にループできて、どのブラウザでも見られる最強のアニメーションイメージ(動画)ファイルです。
色やフレームレートの設定をちゃんとすれば容量は大きくなりません。

やりたいこと
自分的にはOKという意思をgifアニメーションで表現でき、ネイティブアプリはインストール面倒だからwebアプリにし、ついでにいろんなエフェクトつけてTikTokみたいにしたい
フィジビリティチェック
gifアニメーション撮影 = webRTC
gifアニメーション保存 = gif.js できる
エフェクト TikTok = WebGL、shader
webアプリ = できる
つまりできる
準備編
デザインについて
まずはデザインを作ります。今回はAdobe XDとAdobe Illustratorを使います
https://www.adobe.com/jp/products/xd.html
XDを使えばUIだけでなく画面遷移などのプロトタイプを手頃に
作成、デバイスで確認、他のメンバーに共有してフィードバックをもらうこともできます。

gifのloadや生成時にユーザーを飽きさせないように専用のgifをAdobe AfterEffectsで作ります。

フロント実装について
webアプリ(SPA)
まずはwebアプリを手軽につくるため vue-cli3を使います
vue-cli3から設定ファイル不要(0configっていうらしい)になりました。これがまた不便
vue.config.jsを作ってwebpack設定しましょう
https://cli.vuejs.org/
// vue.config.js

module.exports = {
  // 全体で使うcssを指定
  css: {
    loaderOptions: {
      sass: {
        data: '@import "@/assets/scss/common.scss";',
      },
    },
  },
  // 今までにない設定を変える
  // shaderのファイルを便利に扱うやーつ
  configureWebpack: {
    module: {
      rules: [
        {
          test: /\.(fs|vs|glsl)$/,
          use: [
            {
              loader: 'glsl-shader-loader',
            },
          ],
        },
      ],
    },
  },
};
WebRTC
gifアニメーション撮影に、
WebRTCというリアルタイムコミュニケーション用のAPIからカメラのストリーム情報を
MediaDecices.getUserMedia()で取得します。
// getUserMedia.js
// getUserMedia関数の引数にvideoのdomを渡します。
export default async function getUserMedia(dom) {
  const video = dom;
  // audioはいらない
  const medias = {
    audio: false,
    video: {},
  };
  // フロントカメラかバックカメラどちらか
  medias.video.facingMode = { exact: 'environment' };
  return navigator.mediaDevices
    .getUserMedia(medias)
    .then(stream => {
      // streamを取得して、videoに描画
      video.srcObject = stream;
      return true;
    })
    .catch(err => {
      console.log(err, '対応していません');
      return false;
    });
}
Apple iOSの場合
WebRTCは、iOS11以上でしか使えないし、
ブラウザはSafari以外では動きません
Androidの場合
みんなChromeつかってるので、
とくになにもしなくておk
gif保存
撮影した映像データをgifに変換して保存できるようにします。
gif変換と保存機能両方できる便利ライブラリがあるので使います。
https://github.com/spite/ccapture.js/
ccapture.js内でgif.jsを使うのでこちらも
http://jnordberg.github.io/gif.js/
// capture.js

import { framerate } from './config';

export default class Capture {
  constructor() {
    // インスタンス生成。ここでformatをえらぶ。
    // WebWorkerで動かす
    this.capturer = new CCapture({
      framerate,
      verbose: true,
      format: 'gif',
      workersPath: './js/',
    });
  }

  start() {
    this.capturer.start();
  }

  stop() {
    this.capturer.stop();
  }

  capture(canvas) {
    this.capturer.capture(canvas);
  }

  save() {
    return new Promise(resolve => {
      this.capturer.save(blob => {
        console.log(blob);
        resolve(blob);
      });
    });
  }
}
撮ったgifをみんなで共有できたほうがいいじゃんということで、
firebaseを使ってサービスアプリに変更しましょう
https://firebase.google.com/?hl=ja
// firebase.js

import * as firebase from 'firebase/app';
import 'firebase/database';
import 'firebase/storage';
import EventEmitter from 'events';
import config from './firebaseConfig';
import { FIREBASE_PATH } from './config';

firebase.initializeApp(config);
const db = firebase.database();
const dbDatas = db.ref(`${FIREBASE_PATH.ROOT_PATH}${FIREBASE_PATH.DATAS_PATH}`);
const storageRef = firebase.storage().ref();

class FireBaseManager extends EventEmitter {
  constructor() {
    super();
    this.isPostGif = false;
  }

  getGif() {
    this.onEmitGetData = snapshot => {
      this.emit('emitGetData', snapshot.val());
    };

    dbDatas
      .orderByKey()
      .limitToLast(30)
      .once('value', this.onEmitGetData);
  }
  // gifをストレージに保存後。データベースに情報をいれる
  async postGif(src) {
    if (this.isPostGif) return;
    this.isPostGif = true;
    const uploadRef = await storageRef.child(`${src.name}.gif`);
    const snapshot = await uploadRef.put(src.blob);
    console.log(snapshot, 'snapshot');
    const url = await uploadRef.getDownloadURL();
    const createdTime = firebase.database.ServerValue.TIMESTAMP;
    const dbpush = dbDatas.push();
    // データベースに情報をいれる
    dbpush.set({
      uid: dbpush.key,
      url,
      effect: src.effect,
      timestamp: createdTime,
    });
    this.isPostGif = false;
    this.emit('postComp');
  }
}

const firebaseManager = new FireBaseManager();
export default firebaseManager;
WebGL
WebGL側はThree.jsで簡単に実装しちゃいましょう。
WebRTCでカメラの情報をVideoのdomに映して、
Videoの情報をWebGL側に送ります。
Videoはautoplayにしないと動きません。
requestAnimetionではなく、TweenMaxのtickを使用します(便利だから)。
エフェクトの切り替えはuniformで 0 or 1 を渡して、切り替えます。
なのでエフェクト分のuniformを定義して、Switch文で管理します。
gif撮影中は容量削減のため,フレームレートを一気に下げます。
TweenMax.ticker.fps(framerate);
// webgl.js

import * as THREE from 'three';
import { TweenMax } from 'gsap/TweenMax';
import EventEmitter from 'events';
import frag from '../shader/fragment.fs';
import vert from '../shader/vertex.vs';
import Capture from '@/assets/js/Capture';
import { framerate, timeLimit, EFFECTS_LIST } from './config';

// fpsを30にする、秒間60も必要ない
TweenMax.ticker.fps(30);
// 保険
TweenMax.lagSmoothing(1000, 20);

const LAPLACIAN = [-1.0, -1.0, -1.0, -1.0, 8.0, -1.0, -1.0, -1.0, -1.0];
export default class WebglCamera extends EventEmitter {
  constructor() {
    super();
    this.capturer = new Capture();
  }

  setDom(canvas, video) {
    this.canvas = canvas;
    this.video = video;
    this.isCapturer = false;
    this.clock = new THREE.Clock();
    this.count = 0;
    this.initThree();
  }

  setEffect(num) {

    this.effect = EFFECTS_LIST[num];
    this.uniforms.uIsSymmetry.value = 0.0;
    this.uniforms.uIsNormal.value = 0.0;
    this.uniforms.uIsMosaic.value = 0.0;
    this.uniforms.uIsMonochrome.value = 0.0;
    this.uniforms.uIsHsv.value = 0.0;
    this.uniforms.uIsHalftone.value = 0.0;
    this.uniforms.uIsInverse.value = 0.0;
    this.uniforms.uIsEdge.value = 0.0;
    this.uniforms.uIsInsta.value = 0.0;
    this.uniforms.uIsChromatic.value = 0.0;
    this.uniforms.uIsKaleidoScope.value = 0.0;
    this.uniforms.uIsVhs.value = 0.0;
    this.uniforms.uIsToon.value = 0.0;
    this.uniforms.uIsGlitch.value = 0.0;
    this.uniforms.uIsSen.value = 0.0;

    switch (this.effect) {
    case 'シンメトリー':
      this.uniforms.uIsSymmetry.value = 1.0;
      break;
    case 'ノーマル':
      this.uniforms.uIsNormal.value = 1.0;
      break;
    case 'モザイク':
      this.uniforms.uIsMosaic.value = 1.0;
      break;
    case '白黒':
      this.uniforms.uIsMonochrome.value = 1.0;
      break;
    case 'hsv':
      this.uniforms.uIsHsv.value = 1.0;
      break;
    case 'ハーフトーン':
      this.uniforms.uIsHalftone.value = 1.0;
      break;
    case 'エッジ':
      this.uniforms.uIsEdge.value = 1.0;
      break;
    case 'インスタ':
      this.uniforms.uIsInsta.value = 1.0;
      break;
    case '色反転':
      this.uniforms.uIsInverse.value = 1.0;
      break;
    case '色収差':
      this.uniforms.uIsChromatic.value = 1.0;
      break;
    case 'VHS':
      this.uniforms.uIsVhs.value = 1.0;
      break;
    case '万華鏡':
      this.uniforms.uIsKaleidoScope.value = 1.0;
      break;
    case 'トゥーン':
      this.uniforms.uIsToon.value = 1.0;
      break;
    case 'グリッチ':
      this.uniforms.uIsGlitch.value = 1.0;
      break;
    case '線':
      this.uniforms.uIsSen.value = 1.0;
      break;

    default:
      this.uniforms.uIsNormal.value = 1.0;
      break;
    }
  }

  initThree() {
    this.width = this.video.videoWidth;
    this.height = this.video.videoHeight;
    this.canvas.width = this.width;
    this.canvas.height = this.height;
    this.videoTexture = new THREE.VideoTexture(this.video);
    this.videoTexture.minFilter = THREE.LinearFilter;
    this.videoTexture.magFilter = THREE.LinearFilter;
    this.videoTexture.mapping = THREE.ClampToEdgeWrapping;
    this.videoTexture.format = THREE.RGBFormat;

    this.scene = new THREE.Scene();
    this.camera = new THREE.PerspectiveCamera(
      40,
      this.width / this.height,
      0.1,
      2,
    );
    this.camera.lookAt(new THREE.Vector3(0.0, 0.0, 0.0));
    this.camera.position.z = 1;

    this.renderer = new THREE.WebGLRenderer({ canvas: this.canvas });
    this.renderer.setClearColor(0xffffff);
    this.renderer.setSize(this.width / 2, this.height / 2);
    this.renderer.setPixelRatio(1);

    this.uniforms = {
      uTexture: {
        type: 't',
        value: this.videoTexture,
      },
      uTime: {
        type: 'f',
        value: this.time,
      },
      uResolution: {
        type: 'v2',
        value: [this.width / 2, this.height / 2],
      },
      uIsNormal: {
        type: 'f',
        value: 1.0,
      },
      uIsSymmetry: {
        type: 'f',
        value: 0.0,
      },
      uIsMosaic: {
        type: 'f',
        value: 0.0,
      },
      uIsMonochrome: {
        type: 'f',
        value: 0.0,
      },
      uIsHsv: {
        type: 'f',
        value: 0.0,
      },
      uIsHalftone: {
        type: 'f',
        value: 0.0,
      },
      uIsEdge: {
        type: 'f',
        value: 0.0,
      },
      uIsInsta: {
        type: 'f',
        value: 0.0,
      },
      uIsInverse: {
        type: 'f',
        value: 0.0,
      },
      uLaplacian: {
        type: '1fv',
        value: LAPLACIAN,
      },
      uIsChromatic: {
        type: 'f',
        value: 0.0,
      },
      uIsKaleidoScope: {
        type: 'f',
        value: 0.0,
      },
      uIsVhs: {
        type: 'f',
        value: 0.0,
      },
      uIsToon: {
        type: 'f',
        value: 0.0,
      },
      uIsGlitch: {
        type: 'f',
        value: 0.0,
      },
      uIsSen: {
        type: 'f',
        value: 0.0,
      },
    };

    const mesh = new THREE.Mesh(
      new THREE.PlaneGeometry(0.75, 1),
      new THREE.RawShaderMaterial({
        fragmentShader: frag,
        vertexShader: vert,
        uniforms: this.uniforms,
      }),
    );
    this.scene.add(mesh);

    // レンダリング
    this.render = () => {
      this.time = this.clock.getElapsedTime();
      this.uniforms.uTime.value = this.time;

      this.renderer.render(this.scene, this.camera);
      this.videoTexture.needsUpdate = true;

      if (this.isCapturer && this.count === framerate * timeLimit) {
        this.isCapturer = false;
        this.count = 0;
        this.capturer.stop();
        this.emit('captureComp');
        this.capturer.save().then(blob => {
          this.emit('saveComp', blob);
        });

        TweenMax.ticker.fps(30);
        this.capturer = new Capture();
      }
      if (this.isCapturer) {
        this.count += 1;
        this.emit('decrementCount', this.count);
        this.capturer.capture(this.canvas);
      }
    };
    TweenMax.ticker.addEventListener('tick', this.render);
  }

  startCapture() {
    this.isCapturer = true;
    TweenMax.ticker.fps(framerate);
    this.capturer.start();
  }

  destroy() {
    TweenMax.ticker.removeEventListener('tick', this.render);
  }
}
エフェクト
GLSLのfragment shaderを使ってエフェクトを作成します。
あるあるエフェクト集てきなものを調べて実装するだけですね。
(ハーフトーン、色収差、モザイクとか)
エフェクトをエフェクト名ずつ別ファイル(モジュール化)にしましょう
昔、glslifyというものがありまりましたが、時代はwebpackになってしまったので、代わりのものを探します。
https://qiita.com/yuichiroharai/items/ecbfd2d7729c7384fb3a
glsl-shader-loaderを使います。
https://www.npmjs.com/package/glsl-shader-loader
使い方は簡単で
#pragma loader: import randomDirection from './collections/random.glsl';
みたいな書き方ですね。
ちなみに
precision highp float;
にしないとiOSデバイスでちゃんと描画されないので気をつけましょう。
WebGL Schoolとか
GLSL Schoolに通って勉強してみてください。
https://webgl.souhonzan.org/?category=tagged&v=school
// fragment.fs

precision highp float;

uniform sampler2D uTexture;
uniform float uTime;
uniform vec2 uResolution;
uniform float uIsSymmetry;
uniform float uIsNormal;
uniform float uIsMosaic;
uniform float uIsMonochrome;
uniform float uIsHsv;
uniform float uIsHalftone;
uniform float uIsInverse;
uniform float uIsEdge;
uniform float uIsInsta;
uniform float uLaplacian[9];
uniform float uIsChromatic;
uniform float uIsKaleidoScope;
uniform float uIsVhs;
uniform float uIsToon;
uniform float uIsGlitch;
uniform float uIsSen;

varying vec2 vUv;

const float PI = 3.14;
const float TAU = PI * 2.0;
#pragma loader: import normal from './normal.fs';
#pragma loader: import symmetry from './symmetry.fs';
#pragma loader: import inverse from './inverse.fs';
#pragma loader: import monochrome from './monochrome.fs';
#pragma loader: import mosaic from './mosaic.fs';
#pragma loader: import hsv from './hsv.fs';
#pragma loader: import halftone from './halftone.fs';
#pragma loader: import edge from './edge.fs';
#pragma loader: import insta from './insta.fs';
#pragma loader: import chromaticAberration from './chromaticAberration.fs';
#pragma loader: import kaleidoScope from './kaleidoScope.fs';
#pragma loader: import vhs from './vhs.fs';
#pragma loader: import toon from './toon.fs';
#pragma loader: import glitch from './glitch.fs';
#pragma loader: import sen from './sen.fs';

void main () {
  vec2 texcoord = gl_FragCoord.st / uResolution;
  // -1 ~ 1にするやーつ
  vec2 p = texcoord * 2.0 - 1.0;

  vec4 normal = normal(texcoord) * uIsNormal;
  vec4 symmetry = symmetry() * uIsSymmetry;
  vec4 monochrome = monochrome(texcoord) * uIsMonochrome;
  vec4 mosaic = mosaic() * uIsMosaic;
  vec4 hsv = hsv(texcoord) * uIsHsv;
  vec4 Halftone = halftone(texcoord) * uIsHalftone;
  vec4 inverse = inverse(texcoord) * uIsInverse;
  vec4 edge = edge(texcoord) * uIsEdge;
  vec4 insta = insta(texcoord, p) * uIsInsta;
  vec4 chromaticAberration = chromaticAberration(texcoord) * uIsChromatic;
  vec4 vhs = vhs(texcoord, p) * uIsVhs;
  vec4 kaleidoScope = kaleidoScope(texcoord) * uIsKaleidoScope;
  vec4 toon = toon(texcoord) * uIsToon;
  vec4 glitch = glitch(texcoord) * uIsGlitch;
  vec4 sen = sen(texcoord) * uIsSen;

  vec4 color = toon + symmetry + normal + monochrome + mosaic + hsv + Halftone + edge + insta + inverse + vhs + kaleidoScope + chromaticAberration + glitch + sen;

  gl_FragColor = color;
}
// normal.fs
vec4 normal(vec2 uv){
  vec4 texture = texture2D(uTexture, uv);
  return texture;
}
// glitch.fs
vec4 glitch(vec2 uv){
    float PI = 3.1415;
    float moveX = sin(uTime * 100.0) * 0.01;
    float moveY = sin(uTime * 100.0 + ( PI / 4.0 )) * 0.001;

    vec2 muv1 = vec2(floor(uv.x * 2.0) / 2.0, floor(uv.y * 10.0) / 10.0) + uTime * 0.01;
    vec2 muv2 = vec2(floor(uv.x * 4.0) / 4.0, floor(uv.y * 16.0) / 16.0) + uTime * 0.98;
    vec2 muv3 = vec2(floor(uv.x * 8.0) / 10.0, floor(uv.y * 14.0) / 14.0) + uTime * 0.5;

    float noise1 = step(0.7, snoise(vec3(muv1 * 4.0, 1.0)));
    float noise2 = step(0.6, snoise(vec3(muv2 * 4.0, 1.0)));
    float noise3 = step(0.8, snoise(vec3(muv3 * 6.0, 1.0)));

    float mergeNoise = noise1 + noise2 + noise3;

    vec2 mergeUv = uv + mergeNoise * 0.1;
    vec4 texture = vec4(
        texture2D(uTexture, vec2(mergeUv.x - moveX, mergeUv.y - moveY)).r,
        texture2D(uTexture, mergeUv).g,
        texture2D(uTexture, mergeUv).b,
        1.0
    );

    // Output to screen
    return texture;
}
完成
これであなただけのLGTM gifを相手に叩きつけることができます。

gitのリポジトリはこちら。
オリジナルのエフェクトを作ってみましょう!
github.com
まとめ
webって環境を限定すればなんでもできますね。
ブラウザがChromeだけの時代が来ませんかねぇ。
しかし、FANGは、世界の成長を止めてる説もありますし、
Chromeだけっていうのもやばいかもですね。うーん。
面白法人カヤックでは、LGTMボケに対してツッコミできるエンジニアを募集中です。
一番ほしいのはボケを引き立たせるツッコミ役です。
面白法人カヤックアドベントカレンダー、
明日はのken39argさんがGitHubへの愛を語ります。